Sunday, January 31, 2016

Frozen Birthday party

My little girl is a HUGE fan of the movie Frozen, so when it came time for her Birthday party it was the obvious choice for the theme of her party. Pinterest became my best friend and enemy for this party because there are so many ideas out there for Frozen Birthday parties. I found it very overwhelming, not knowing really what direction I wanted to take with her party, other than I wanted it to be reasonably priced and fun.
In the end I think it turned out well and it was a fun time for all my daughters friends. I took some of the ideas I found and used them as much as I could within my budget.

Food Table:
I took a white drop cloth from the Dollar tree and used it as a backdrop behind the table. Some silver garland on sale after Christmas framed it out and I put it around the table. My husband cut out some snowflakes for me and I spray painted them blue. A last minute purchase I made was a 6.00 Frozen kit from Target that had a mountain backdrop and a bunch of cardboard/poster board Frozen characters. This was perfect because I didn't have time to draw them and it really brought it together. 

I would have liked to have gotten more blue tulle to put all the way around the table, but I wasn't really willing to spend more money on another role of tulle, but it gave the desired look I wanted even it if it doesn't cover all sides of the table.
 (In our kitchen we have a small table where the kids ate and I had snowflakes hanging down from the ceiling, which also came with the Frozen decorating kit. (that kit saved me a lot of time and energy!))
We had the party at dinner time, and unfortunately I didn't take any close up photographs of the food tags. I used Styrofoam balls from the dollar tree and stuck the food tags in them. I think it achieved the look of snowballs. On some of the tags I drew cutesie images and on others I used some of my daughters Frozen stickers. :)
Sandwiches: "We finish each others sandwiches!"
Meatballs: Stone Trolls
Cake Pops: Snowballs
Hershey Kisses: "What's that smell?...chocolate!!"
Carrot sticks and pretzel sticks: Sven's snacks
Bottled water: Melted ice
Funfetti Cupcakes
Snowflake  shaped Sugar Cookies: Snowflakes
Mac and Cheese
 Play Area: We put icicle lights someone gave us around our play area. This was a young kids party so there were not a lot of activities for the kids to do, they just play together and with the toys.


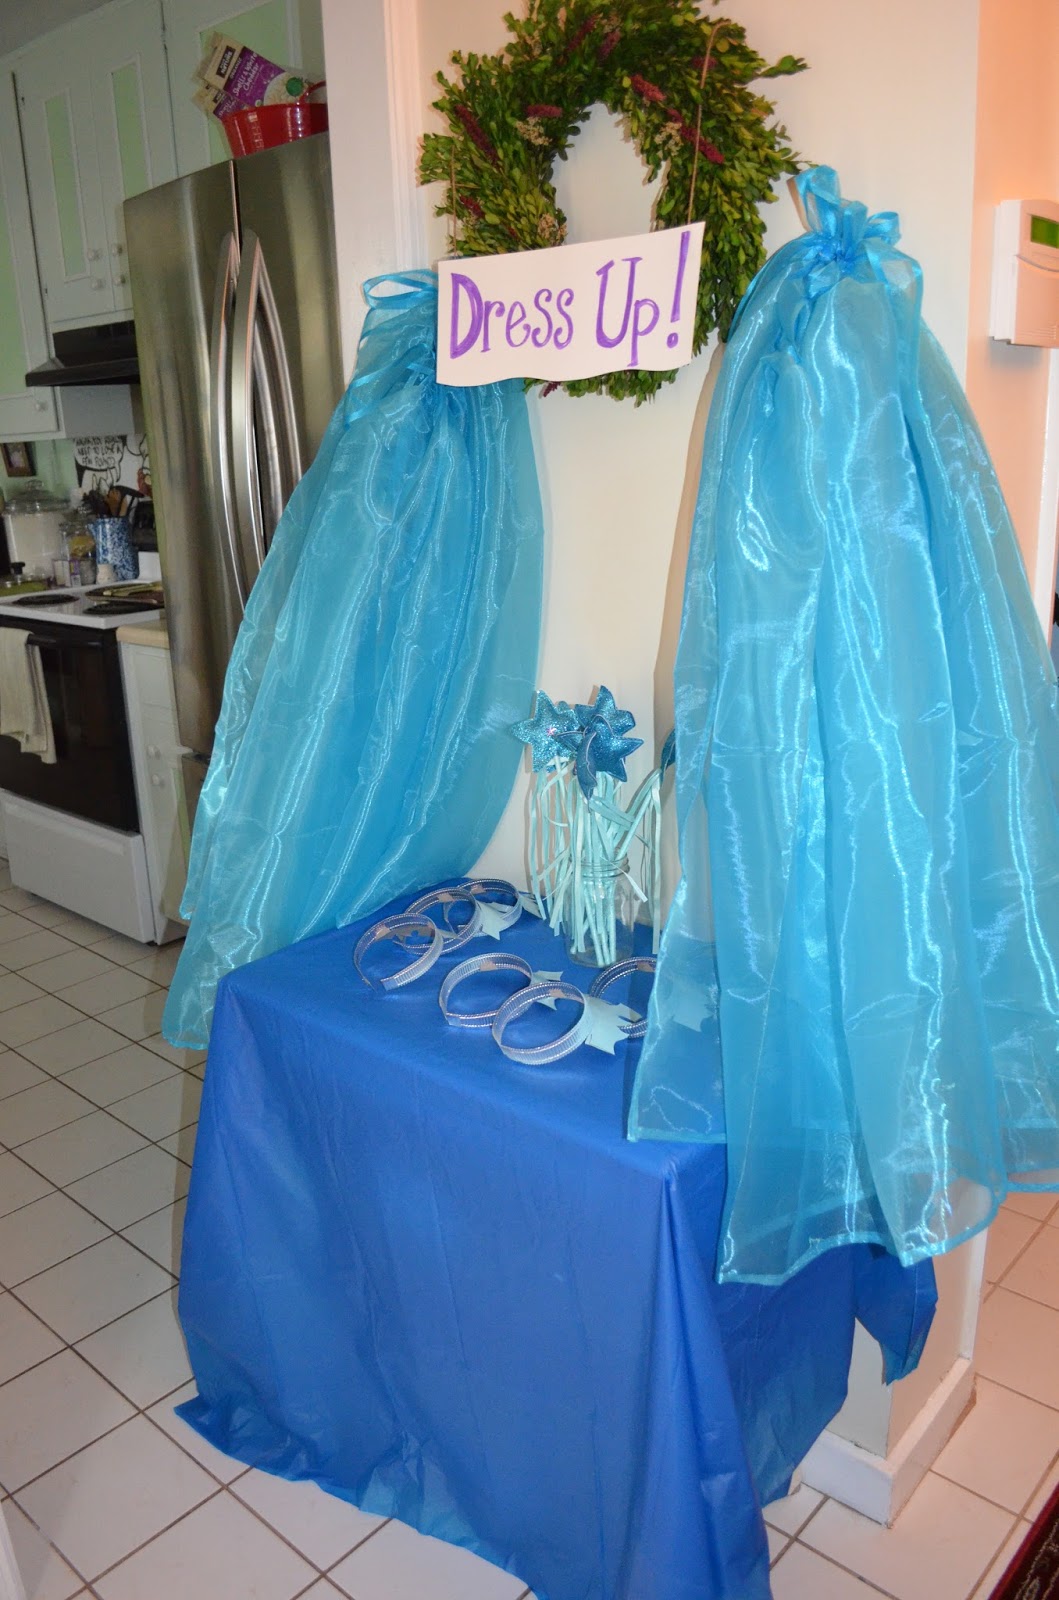
Entryway: As you walk in the front door there are a lot of hanging icicle lights from the ceiling in the foyer. there is also the mountain backdrop sheet that came in the Frozen kit from Target. My sister bought these adorable blue capes, I got the star wands for $1.00 each at Target and the crowns I tweaked from a bag of princess crowns at the Dollar Tree.

 Another view of the foyer with the icicle lights and the backdrop.

GAME: One game I made was called Snowman Slam. I took Styrofoam cups drew snowman faces on them and took some Styrofoam balls and put them in a tub and called it snowman slam!
Above this I put some blue icicle lights someone gave us and I drew Olaf.
 The Kristoff and Sven images came from the Frozen kit I bought. I also had little goody bags of things I found on sale after Christmas that were Frozen related. They were cute little make up and nail polish kits.
 My Birthday princess in her Ana dress from her aunt.


Friday, July 4, 2014

Stone fireplace makeover

BEFORE:
 This stone fireplace is a major focal point in our living room. Ever since we moved in I have wanted to do something with it because it is very rough and impossible to clean. Spiderwebs were always between the rocks it seemed and after a lot of scrubbing I still couldn't get the smoke stains off the rocks.
I read a lot about others who have painted fireplaces and most of them used a paint sprayer. I do not have a paint sprayer and I wasn't really willing to spend the money on one for this project. I bought some inexpensive brushes and took some primer I had from a previous project. I had to buy another can of primer, so in total I used about one and a half cans of primer for this project.

IN PROGRESS:

 I first primed the stones. This took a lot of work and my paintbrush was destroyed from painting the stones.
 I didn't prime part of the mantle because I was going to remove that part of the mantle.
 I painted the stone this gold color, in a semi gloss finish. I had some white trim paint left from painting my baseboards and used that to paint the mantle. The mantle was in three pieces and using a crow bar I removed the piece on either side of the middle.  Eventually my husband will cut the mantle down so that it is square at the ends rather then on an angle, but for now it works just fine.

AFTER:
Just about done!
My amazing husband built the bookshelf to fit inside the fireplace. I then used expanding foam and drywall putty to fill in the gaps around the bookshelf.  For those of you who are mortified by our enclosing the fireplace, we never use it so it was a bit of wasted space. Now my son can sit on the fireplace and in the baskets on the bottom of the bookshelf I have his trains and train tracks.
   
Some of our 4th of July decorations.
The fireplace is done, I just have to do some touch up on the wall paint from removing the mantle. I may also add a third basket to the bottom shelf of the bookshelf.


WOW! I'm so excited this project is done. We currently have our 4th of July decorations up, so I'm not sure what I will put above the mantle after this holiday is over, but we are enjoying our seasonal decorations for now. I may create a painting to have hanging up in between holidays.


BEFORE
AFTER

Monday, June 30, 2014

Multipurpose kitchen eating area

Before:  
When we first moved into the house I painted the walls yellow, I'm not sure what color they were originally. They were dirty and smelled is all I can remember.

I also painted the cabinets white when we moved in and spray painted the handles red. I wish I had a before before picture, but there were no lights working when we moved in so I wouldn't have been able to get a good picture.

Kitchen Eating area


 AFTER:

This space has changed A LOT since we first moved in and is a continual work in progress to make the most of the space we have to work with. It is a little more crowded then I would like, but with the space we have in our house some things are going to be a little crowded and somewhat cluttered.
Stick on White Board: This is one of those whiteboard stickers I got from a hardware store. I found that when I erased anything off the board the door became very dirty and black. I painted with acrylic paints around the white board this frame to keep the door from looking dingy. Dried acrylic paint is very easy to clean, so it works great! This small white board is great for to-do lists, notes, reminders and such.
On the wall next to the door I bought a small white board that has the days of the week, I put our families schedule on it every week so I can glance at it or add things to it easily throughout the week.
I'm not very fond of all the bags under the small white board, but I'm not sure where else to store these bags so I can easily grab them before walking out the door.
I added these shelves to add more storage when we moved in to this house. Recently I added another shelf to it to create even more storage. I also moved my sons schedule to below the shelves so all his educational things were in one area.
I also changed the hardware on the kitchen cabinets, and added the rectangles to the cabinet face.
The play kitchen is from IKEA, it is wonderful and a great way to keep my little ones entertained while I am cooking.

This kitchen table is currently in its smallest size, but can have a leaf put in to be a larger table. I like it being smaller so I can get to the whiteboard during our school time.
For mothers day I got the basket on the table to put the materials we use everyday. My family also bought me the floating shelves for mothers day. I love them!

This whiteboard was free! Our church was having a work day and was replacing all their whiteboards with new ones and were going to throw these away and my wonderful husband was able to get one! (Thankfully it fit on this wall!) I attached cork squares to part of the white board to put my sons daily work on display. I also put clothespins on the sides with double stick foam tape for additional places to hang artwork and such. This whiteboard is not magnetic, so I use ticky tacky (that blue sticky stuff).


Calendar and shelf wall


 STORAGE: My husband built this bench that I use for our resources for school that we don't use on a daily basis. I found these great plastic totes with handles in the garden section at Walmart that have been wonderful in separating our materials into a crafts bin, alphabet, preschool and kindergarten books.

I really enjoy this area now and all the different uses we get out of this relatively small space.

Thursday, May 15, 2014

Trash to Treasure: Bookshelf

Walking is great exercise and I can find things on trash day to sell or use in our house.

BEFORE:

Found solid wood bookshelf on the side of the road, was a little beat up, and dirty. It does look like someone enjoyed this shelf before getting rid of it, and I'm so excited to have found this!
 Front view of bookshelf
Left side of bookshelf
Right side of bookshelf


AFTER:
Cleaned bookshelf and painted with some extra trim paint I had leftover from another project.


Back of bookshelf
Side of bookshelf


In progress...I was trying to figure out where to put the shelf. I knew where I wanted it to go when I saw it I had to do some rearranging to have it fit best in my sons play area. The blue drawers seen in the picture were where the white shelf is next to the recliner.

Finished (for now)...
I moved the recliner into our living room I moved the blue drawers under my sons bed for some extra storage. I then moved the tool bench in place of the recliner. It opens up the space and gives my son more room to play. This is part of our dining room turned play area, so the more organization the better! We don't have a lot of space and as our children are growing I have found the need to be creative with the space we have and make each room have multiple purposes. (More to come on how I have made our kitchen into an eating area/school space.)

My son has a lot of educational toys and I wanted them to be spread out (similar to how I have seen it at the preschool I used to work at), rather than piled together in a toy bin. I am really pleased with how it turned out and how well it cleans up the space. 


Friday, April 25, 2014

Magnet Board Redone

Before: 
I bought this drip pan from Walmart to be a magnet board for my son because I wanted him to have a place other than the refrigerator for his magnets. I don't have a lot of space so I put the drip pan on one of the glass doors leading out to our backyard.
I've had it there for about a year and decided I didn't like how cluttered it makes our living room look. My son has a play area in our dining room (pictures to come soon!) and I felt his things were taking over the house.

 After:
I recently repainted our whiteboard easel this off white color and had this empty space below the white board/paper roll.
I measured the area I wanted to put the pan in and cut it down to fit. I used foam double stick tape to attach it to the easel. The side I cut was a little sharp so I taped those sides with masking tape so there weren't any sharp edges showing.
I bought these metal bins for my sons birthday party and thought they would make great containers for his magnets.
 (Side note: I bought this easel at a homeschool yard sale and after having the easel for three years it finally occurred to me how I can attach the paper roll to the easel. I used a tension rod!)


 I used the rest of the pan to make a calendar. I had number cards I purchased when I was teaching, but hadn't used. I cut them down to fit in the squares.


I didn't like the way the pan looked in the kitchen and I had this old frame leftover from another project, so I added a fresh coat of paint and hot glued the frame to the metal pan.

This also helped with the problem of hanging the pan. It kept falling off the wall.

I added eye hooks and picture hanging wire to the back of the frame so I would be able to hang it without it crashing down as it had done three times before I put the pan on the frame.


 Close up of the frame attached to the drip pan.


I also painted "today is" on the bottom of the pan. I am going to eventually make new days of the week, as well as new month cards.

One of the great things about having this in the kitchen is there is a bench my husband built under this so my son can climb up and add the day and date each day.

I haven't quite figured out where to store all the dates and days of the week we aren't using. That will have to be another project for another day.

Another problem is the space between the bottom of the drip pan and the bottom of the frame don't quite line up, but I think I can fix it when I figure out a storage solution for the date and day of the week cards.

 FINISHED! (sort of:))
There is always more work and improvements that can be made.