Monday, June 30, 2014

Multipurpose kitchen eating area

Before:  
When we first moved into the house I painted the walls yellow, I'm not sure what color they were originally. They were dirty and smelled is all I can remember.

I also painted the cabinets white when we moved in and spray painted the handles red. I wish I had a before before picture, but there were no lights working when we moved in so I wouldn't have been able to get a good picture.

Kitchen Eating area


 AFTER:

This space has changed A LOT since we first moved in and is a continual work in progress to make the most of the space we have to work with. It is a little more crowded then I would like, but with the space we have in our house some things are going to be a little crowded and somewhat cluttered.
Stick on White Board: This is one of those whiteboard stickers I got from a hardware store. I found that when I erased anything off the board the door became very dirty and black. I painted with acrylic paints around the white board this frame to keep the door from looking dingy. Dried acrylic paint is very easy to clean, so it works great! This small white board is great for to-do lists, notes, reminders and such.
On the wall next to the door I bought a small white board that has the days of the week, I put our families schedule on it every week so I can glance at it or add things to it easily throughout the week.
I'm not very fond of all the bags under the small white board, but I'm not sure where else to store these bags so I can easily grab them before walking out the door.
I added these shelves to add more storage when we moved in to this house. Recently I added another shelf to it to create even more storage. I also moved my sons schedule to below the shelves so all his educational things were in one area.
I also changed the hardware on the kitchen cabinets, and added the rectangles to the cabinet face.
The play kitchen is from IKEA, it is wonderful and a great way to keep my little ones entertained while I am cooking.

This kitchen table is currently in its smallest size, but can have a leaf put in to be a larger table. I like it being smaller so I can get to the whiteboard during our school time.
For mothers day I got the basket on the table to put the materials we use everyday. My family also bought me the floating shelves for mothers day. I love them!
This whiteboard was free! Our church was having a work day and was replacing all their whiteboards with new ones and were going to throw these away and my wonderful husband was able to get one! (Thankfully it fit on this wall!) I attached cork squares to part of the white board to put my sons daily work on display. I also put clothespins on the sides with double stick foam tape for additional places to hang artwork and such. This whiteboard is not magnetic, so I use ticky tacky (that blue sticky stuff).


Calendar and shelf wall


 STORAGE: My husband built this bench that I use for our resources for school that we don't use on a daily basis. I found these great plastic totes with handles in the garden section at Walmart that have been wonderful in separating our materials into a crafts bin, alphabet, preschool and kindergarten books.

I really enjoy this area now and all the different uses we get out of this relatively small space.

Thursday, May 15, 2014

Trash to Treasure: Bookshelf

Walking is great exercise and I can find things on trash day to sell or use in our house.

BEFORE:

Found solid wood bookshelf on the side of the road, was a little beat up, and dirty. It does look like someone enjoyed this shelf before getting rid of it, and I'm so excited to have found this!
 Front view of bookshelf
Left side of bookshelf
Right side of bookshelf


AFTER:
Cleaned bookshelf and painted with some extra trim paint I had leftover from another project.


Back of bookshelf
Side of bookshelf


In progress...I was trying to figure out where to put the shelf. I knew where I wanted it to go when I saw it I had to do some rearranging to have it fit best in my sons play area. The blue drawers seen in the picture were where the white shelf is next to the recliner.

Finished (for now)...
I moved the recliner into our living room I moved the blue drawers under my sons bed for some extra storage. I then moved the tool bench in place of the recliner. It opens up the space and gives my son more room to play. This is part of our dining room turned play area, so the more organization the better! We don't have a lot of space and as our children are growing I have found the need to be creative with the space we have and make each room have multiple purposes. (More to come on how I have made our kitchen into an eating area/school space.)

My son has a lot of educational toys and I wanted them to be spread out (similar to how I have seen it at the preschool I used to work at), rather than piled together in a toy bin. I am really pleased with how it turned out and how well it cleans up the space. 


Friday, April 25, 2014

Magnet Board Redone

Before: 
I bought this drip pan from Walmart to be a magnet board for my son because I wanted him to have a place other than the refrigerator for his magnets. I don't have a lot of space so I put the drip pan on one of the glass doors leading out to our backyard.
I've had it there for about a year and decided I didn't like how cluttered it makes our living room look. My son has a play area in our dining room (pictures to come soon!) and I felt his things were taking over the house.

 After:
I recently repainted our whiteboard easel this off white color and had this empty space below the white board/paper roll.
I measured the area I wanted to put the pan in and cut it down to fit. I used foam double stick tape to attach it to the easel. The side I cut was a little sharp so I taped those sides with masking tape so there weren't any sharp edges showing.
I bought these metal bins for my sons birthday party and thought they would make great containers for his magnets.
 (Side note: I bought this easel at a homeschool yard sale and after having the easel for three years it finally occurred to me how I can attach the paper roll to the easel. I used a tension rod!)


 I used the rest of the pan to make a calendar. I had number cards I purchased when I was teaching, but hadn't used. I cut them down to fit in the squares.


I didn't like the way the pan looked in the kitchen and I had this old frame leftover from another project, so I added a fresh coat of paint and hot glued the frame to the metal pan.

This also helped with the problem of hanging the pan. It kept falling off the wall.

I added eye hooks and picture hanging wire to the back of the frame so I would be able to hang it without it crashing down as it had done three times before I put the pan on the frame.


 Close up of the frame attached to the drip pan.


I also painted "today is" on the bottom of the pan. I am going to eventually make new days of the week, as well as new month cards.

One of the great things about having this in the kitchen is there is a bench my husband built under this so my son can climb up and add the day and date each day.

I haven't quite figured out where to store all the dates and days of the week we aren't using. That will have to be another project for another day.

Another problem is the space between the bottom of the drip pan and the bottom of the frame don't quite line up, but I think I can fix it when I figure out a storage solution for the date and day of the week cards.

 FINISHED! (sort of:))
There is always more work and improvements that can be made.

Sunday, March 16, 2014

Construction Birthday Playdate

My son turned two and he loves trucks and we love having friends over...so we decided to have a construction themed Birthday party. A Birthday party with a handful of toddlers is really more like a play date with food and decorations. I had a great time decorating for this party. I didn't plan any activities since at this age the kids just like playing with toys together. I kept it small so as to limit the cost of food and favors. For his first birthday we invited almost everyone we knew, which was fun, but not something we would do every year. This time we just invited his close friends, who are his age and he plays with regularly.

  
In the entryway leading to our front door I put a disposable (although I will reuse it) tablecloth on a card table.my sister bought the plastic hard hats and vests for the kids and this made it more exciting for the kids as they came to the door. I found stickers at Hobby Lobby that I used to write their names and then put on each helmet with their vest.
They all looked adorable in their vests and hard hats.
 
I took Mason Jars and wrapped yellow streamers around the mason jars and painted tools on them to label the silverware. The napkins and orange cones were from Hobby Lobby. I had the white plates leftover from Thanksgiving so they didn't cost anything. I bought the small black plates from Party City because I thought some people might want smaller plates. I put all of this in an easy foil pan so the mason jars didn't get knocked down by any little hands reaching up on the table.
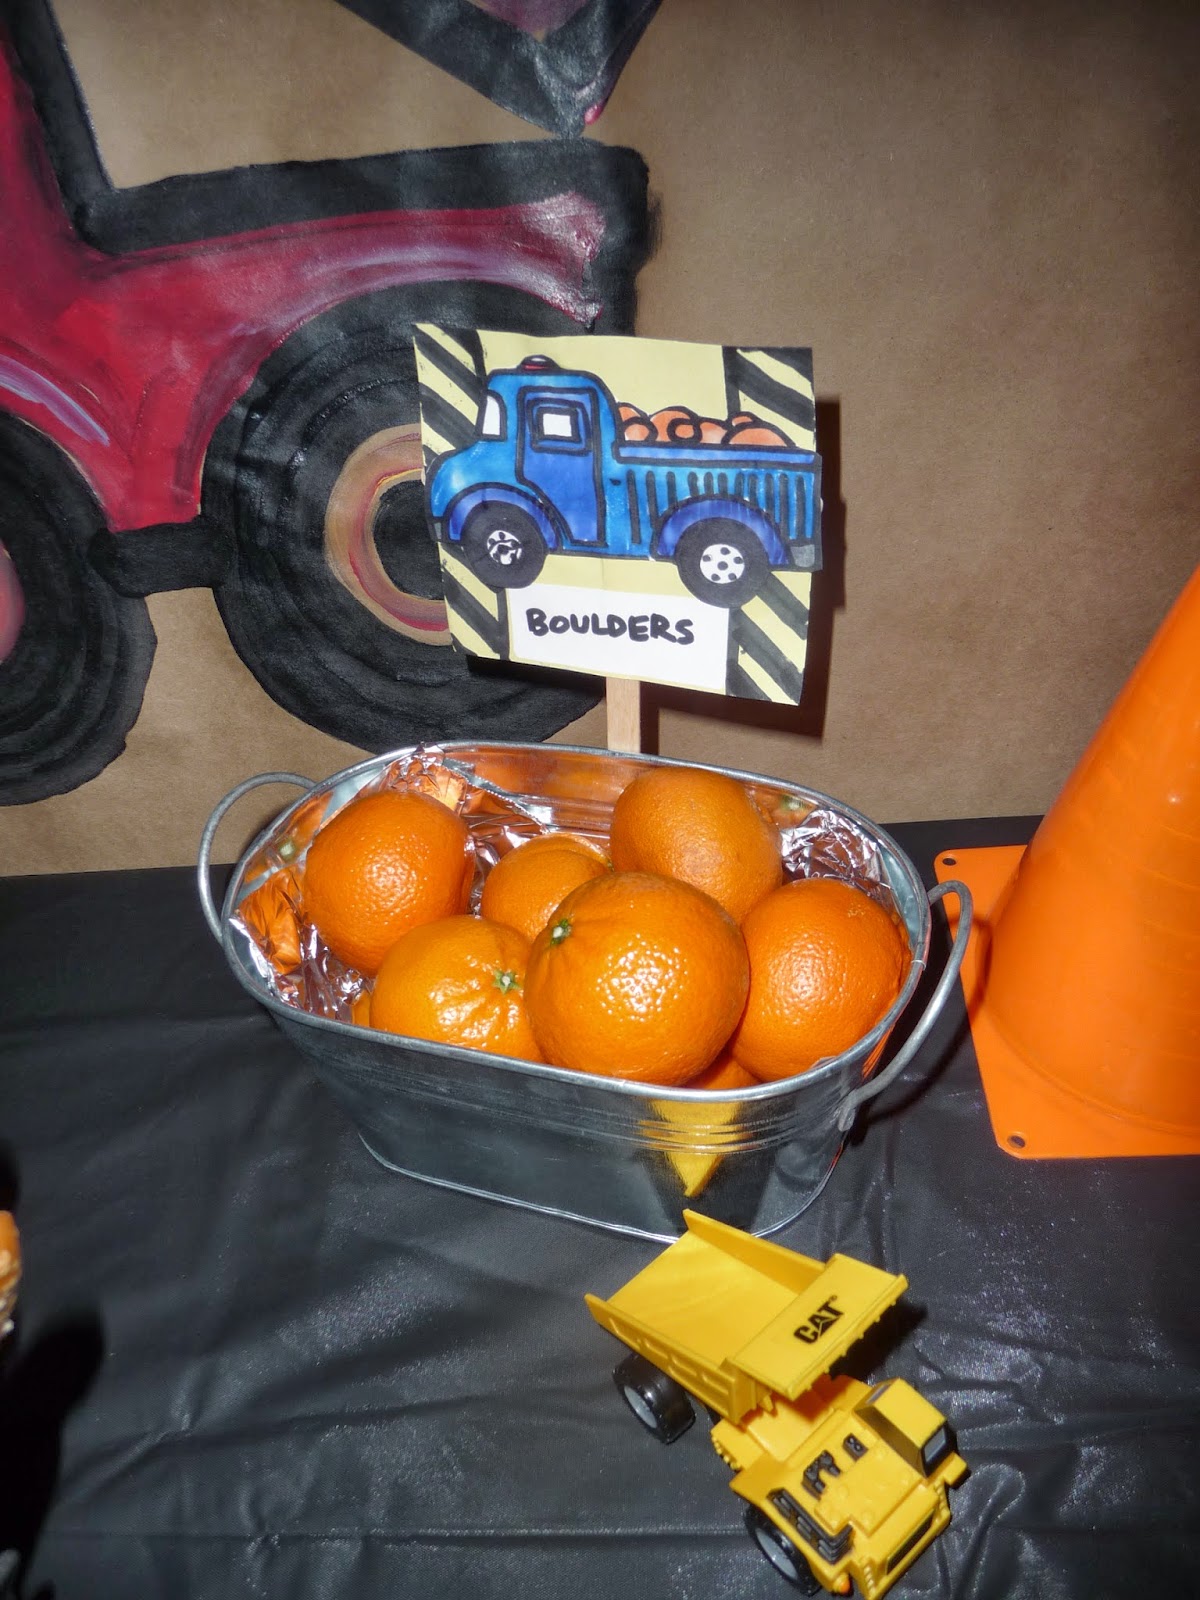
 I used some of my sons trucks as decorations. I bought the small silver tubs the food is in, but I didn't mind buying them because I think I will use them again at other events. I used some paper I had and index cards and drew the trucks that are on the food labels.
Before I colored in the trucks for the labels I copied them and cut them out to make coloring sheets for the kids favor buckets we made.
I used a cupcake stand from another party and spray painted it black. I wanted to make cupcakes...but it didn't happen with all that I had going on so I bought some from Publix. I had thought these cupcake papers would fit around the cupcakes, but they didn't. I will just have to use them for something else.
 Pretzel logs!

 Clementines for boulders!

Doughnut holes for rocks
Chocolate covered donuts for Tires! (I also wanted to make these homemade...but no time...and as my husband says to me with a lot of my ideas...that would have been crazy.)
Refueling Station: Drinks (Drinks not shown, forgot to get a picture with them all set up.)
Orange truck balloons from Hobby Lobby. The only trouble with these balloons is it is hard to tape the balloons to the furniture without the trucks being upside down.
I found these great brown rolls of paper at WalMart that I used to make all the signs. This way I could cut them into different sizes and paint what I needed on them.

I made the Happy Birthday sign on the brown paper, I then painted the truck silhouettes and taped them onto the sign. I hope that I will be able to use the sign again and tape different things on them depending on the theme of the party.
Yellow and Black Streamers were from Party City.

 I painted the brown paper orange and cut out and painted the Dig In sign. (I wish I had made the words bigger and the perfectionist in me disliked it every time I looked at it..but it is not a big deal.) I had this disposable black plastic table cloth I saved from my husbands birthday party a couple years ago. I taped it to the table so it wouldn't move. Using Acrylic paint I painted a road on the tablecloth.

I bought the yellow buckets for the party favors from Party City. Inside I put the small truck coloring sheets I made, crayons, bubbles, stickers and a small plastic truck. 
The caution tape is from Hobby Lobby, but I saw in my research you can also get it at Home Depot. 
The problem with favors is I always forget to give them out by the end of the party, so my husband suggested the time clock idea to draw attention to it in case we forgot. Another cute idea I saw online was a sign that said Don't Forget to Collect Your Wages. 

Our food table was put in my painting area, so I moved the easels sideways in order to fit the table into the corner. 
I had another black tablecloth from a previous party that I also painted a road on for the food table.
I didn't like the way the easels looked behind the table so I made this simple sign.

We had a great time and it was great to get to celebrate another year with our sweet two year old.

Saturday, February 15, 2014

Two years staying home...being creative/making it work

My husband and I decided I would stay at home with our children when we had our son two years ago. This year we welcomed our second child and being creative financially is still a big need. My husband is a teacher and things are tight financially. I have been amazed at Gods continued provision in our lives. It is only by His grace I have been able to stay at home. Many months I didn't know how we would make it and we would then receive an unexpected check in the mail or we would have a yard sale and it would make exactly what we needed for a bill we had received that I was concerned we wouldn't be able to pay. God gives us exactly what we need! All that being said I would like to encourage you if you are thinking of staying home with your children, you can do it! There is nothing better than being  home with my son and daughter.

Here are some ways we have found to make extra money to help out:
  • Sam Goody buys DVDs for anywhere from .50 to over 2.00 a movie depending on what it is.
  • Currently our local Books a Million is buying books, CDs and DVDs.
  • Consignment shops- some will give cash on the spot and others you can get a percentage of money if your clothes sell.
  • Pawn shops will also take DVDs as well as electronics, and video games.
  • Places that buy gold and silver...this is good if you are in a real jam.
  • Yard sales! - We have a yard sale at least once a month. This has been one of the most amazing ways God has provided for us. I will say yard saling is hard work, but after so many sales we have a good system in place to make them run smoother. Our family and friends give us stuff they would give to goodwill or don't need and allow us to keep the proceeds we get.
  • Online yard sales/ Craigslist- I have had a lot of success with online this year.
  • Trash/Walking - one mans trash may be your treasure! I find things on the side of the road on garbage day and the day before I have used towards restocking our yard sale stash or that I fix up and give to my son or sell.
  • Art commissions: I paint and have been hired a lot this year to paint portraits, murals and such. You may not paint but there may be something special you do that you can sell.
  • Babysitting: my husband and I team up and make a great babysitting team for a reasonable price.
  • Dog walking
Do you have any creative ways to make money for your family? Please share them! I'm always looking for new ways to help our family.

Hope this can help someone who is struggling or feels it is impossible to live on one salary. We don't live excessively, but we live comfortably and I am so thankful for my husband who sacrifices and works hard for our family.


Saturday, January 11, 2014

Cake decorating fun

A sweet friend of mine is expecting her first child and I had the opportunity to help with planning the baby shower.
She is a volleyball player and coach so the theme for the shower was that "it's almost game time!" Her husband roots for the Georgia team and she roots for FSU, so the colors for the shower were pink, black and gold.
 No stores sell volleyball decorations...which makes a volleyball themed party more difficult, but more fun (gave us a chance to be creative).
I made the volleyball net from a netted glove I found at Target and two cake pop sticks. I cut the glove up to make the rectangle and hot glued it to the sticks.
I wasn't sure how to tackle the players and decided to draw the Disney Princess Belle serving a volleyball and the Georgia Bulldog.  I took some cardboard cut it out to the same shape as the paper, hot glued cake pop sticks to the back and put paper over that.


 I'm pretty happy with how it all came together. It has been a while since I decorated or made such a large cake.
I saw this idea on Pinterest and I am happy with how easy it was to decorate them, I just iced them with vanilla icing and had a black icing tub with a narrow tip to make the volleyball lines.
I wasn't sure how many people were coming so I made cupcakes as well to make sure we had enough. We had way more than we needed, but that turned out well because then a lot of ladies could bring cupcakes home to their families or husbands.

Glad everything turned out well despite some hiccups in the process of my making the cakes, it all came together.

Sunday, December 22, 2013

Salt Dough Ornaments

Making Salt Dough Ornaments is one of my favorite things to do at Christmas time. Crafts can be intimidating with your little one, but be encouraged, with the proper prep work and sense of humor you and your kiddo will have a great time!

Here is how we make our ornaments with an almost two year old...

1. Preheat oven to 250 degrees.
 2. Prepare ingredients ahead of time, if little hands will be helping to make the dough.
 You will need: 1 cup of flour, 1/2 cup of salt and 1/2 cup of warm water.You will probably not need quite all this water, but this is a good estimate.

 3. Pour salt and flour either in a large bowl or in a zip-lock bag. I thought the zip lock back would be easier, it was in some ways because it meant one less thing for me to wash, but my toddler wasn't as into mixing the ingredients as I wanted him to be. After salt and flour are mixed add a little water add a time and knead together to get to a dough consistency.


4. I put down a plastic cutting board under the dough. Your dough should not be sticky it should have a smooth consistency before you start rolling it out or it will stick to the rolling pin and the cutting board.
 Little ones will need some assistance to get the dough thin enough. I let my son roll it and I press down on the roller as he rolls it. Your dough can be as thick as you like, but probably 1/2" thick seems to cook well and be a good thickness. (Too thin and it will not cook well.)
 5. Cookie cutter fun!

6. Take a straw and poke a hole at the top of the ornaments. (to put string in the ornaments after they are painted and cooked.)
 7. Have a cookie sheet with parchment paper ready for the ornaments to go on after they have been cut out.
 8. Put dough back together into a ball and have it rolled out again.


 9. Place ornaments slightly spaced apart, just be sure they aren't touching or they may stick together.
 10. Bake for two hours.
 (About half way through take ornaments out and flip them over.)
After the ornaments have cooked they will need to get to room temperature before they can be painted. We waited to paint ours until the next day, but you could make the ornaments and cook them in the morning and paint them in the afternoon.
LATER THAT DAY or the NEXT DAY...
Materials needed: Acrylic paints (assorted colors), paper plates, paint brushes, paint shirts, water cup, wipes (ready and open in case of emergency), paper towels
 11. Place ornaments to be painted on paper plate. (I also wrap my sons highchair tray with a garbage bag to be safe. We paint with acrylic paints, so you will need to pay extra attention to your little ones during painting. Acrylic paint will NOT wash out of clothes and it is not good for children to ingest or get on their skin of you can help it.)
 I usually limit his colors at the beginning of painting, I wouldn't put all the colors on the paper plate right away unless you want a brown ornament. I hold the plate with the paint on it to keep my toddler from getting too much paint and keep him from painting the paint plate instead of the ornament.

Allow ornaments to dry completely after they have been painted.

 Painted ornaments!
 The rest of the work will be done by you as the adult. Children should not handle the clear spray paint, there are harmful fumes and this should be done in a well ventilated area, outside on a dry day. If it is raining or went outside the ornament will not dry properly. Spray one side of ornament and allow to dry and then turn over and spray the other side. Ornament should be completely sealed with the clear spray.


I also like to write with either acrylic paint, or bubble paint the year and the name of the child who made the ornament. This can be done before you spray it so the year and name are sealed as well.

Attach a ribbon or string through the hole in the ornament and they are ready to hang on the tree or give as gifts!

Hope it works out for you! Happy crafting! Remember it doesn't have to "Pinterest perfect" to be a successful craft!